Working with Sample Files
Using the samples files provided with FinishLynx can be a great way to become familiar with the software features. By default, FinishLynx saves two sample files during installation.
- Boys3000.evn (an Athletics distance race)
- Sprint.evn (an Athletics sprint race with reverse angle cameras)
To download and install additional files from different sports, go the www.finishlynx.com and click FinishLynx Sample Files (.exe) from the FinishLynx Photo-Finish Software download section.
Here's an overview of the evaluation steps using a sample file:
|
Step 1 |
Open a sample image. |
| Step 2 | Rename and save the sample file. |
|
Step 3 |
Decide how you wish to identify your competitors (Lane, License, ID#, or Nothing) |
|
Step 4 |
Move the hash line to the required position. |
|
Step 5 |
Record the time. Enter competitor identification information (if applicable) and hit Enter. |
|
Step 6 |
(Repeat steps 4 & 5 for each competitor.) |
|
Step 7 |
Save your work. |
|
Step 8 |
Print Results and Images as needed. |
The first step to opening an existing image is to locate the Menu Bar. This extends across the top of the entire screen and looks like Menu Bar.
Each of the words across the top of the screen will become a drop-down menu of options relating to the topic word that shows on the Menu Bar.
Move the mouse over any of the words on the Menu Bar and click the mouse button. The menu for that group of options will appear. Click anywhere outside the menu to make it go away.
- Click on File in the menu bar.
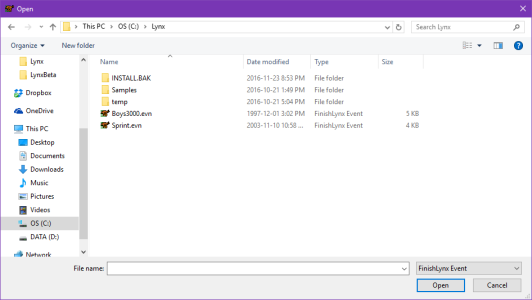
- To work on the sample image click on the word Open.... This action will call up a file browser similar to the one shown in File Browser.
You can select one of these files by moving the cursor over the name of the file you wish to open and double-clicking the mouse button.
Alternatively, you can click the mouse button once on the name of the file you have chosen and then select the Open button from the right hand side of the dialog box.
For the purposes of this initial explanation, we suggest you open Sprint.evn file.
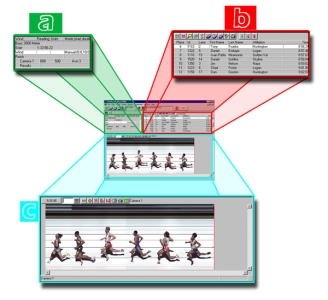
Screen Zones shows the location of the three major zones that comprise a FinishLynx window:
- Information Zone,
- Results Zone,
- Image Zone.
Use the Save As... option from the File drop-down menu to rename the file. Give it any name you choose. This will allow practice with the new file, while keeping the original available if needed.
Before you begin reading the times of the competitors from the image, you need to make a decision about how you are going to identify the competitors.
If you are timing an intra-squad race for example, you may know all the athletes by name and, after you have recorded the times, you can simply type their names into the results. However, when you are timing a major meet with several thousand athletes, you will probably need to rely on a database which is more reliable than your memory.
FinishLynx can use four different modes for identifying competitors. The mode is set by clicking on the ID Mode Icon. The software will move to the next mode in the sequence when an icon is clicked.
ID Mode Icon
-
 License - prior to the event each competitor is given a number assigned by a licensing authority.
 -
 ID - prior to the event each competitor is given an identification code assigned by the meet director - also known as a “Bib Number.”
 -
 Lane - this is the lane the competitor is competing in.
 -
 Nothing (Times only are given by the software, other information is entered by the operator manually).
For this example, set the result mode to “Lane”.
| 1. | Position the hash line. |
|
2. |
Enter the identification information. |
|
3. |
Press the Enter key |
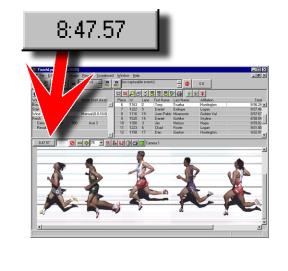
- Position the hash line To automatically enter a time in the results, place the hash line by holding the left mouse button down and moving the mouse over the image. For track events you should align the hash line with the furthest forward part of the competitor’s torso. When the line is in the correct position, let go of the left mouse button. The time for this competitor’s finish will show up in the Finish Time Box shown in Finish Time Box.
- Enter the identification information When the mouse is released above, an I-beam cursor will automatically start flashing in the ID Box - which is located between the Finish Time Box and the ID Mode icon. Determine the lane number for the competitor marked by the hash line and type it in the ID Box.
-
Press the Enter key With the hash line at the right position and the identifier entered in the ID box, simply press the Enter key on the keyboard to assign a time. The time will appear in the Results Zone for the competitor link to the identifier used.
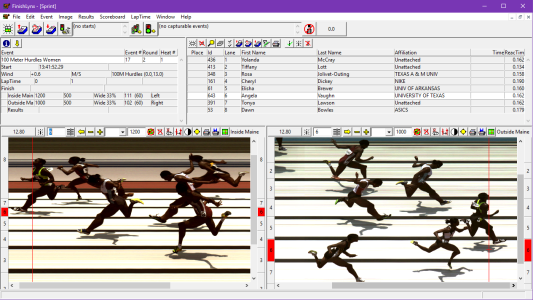
After repeating the process for all eight competitors in the image, the Results Zone should look like this:
When an event is saved, the start, image and results are also saved. The event can be opened at a later time to verify or print information.
- To save an event:
- Click File | Save... from the Menu Bar, or use the keyboard shortcut CTRL-S
- To print the results:
- Click
 , in the Results Zone or Results | Print... from the Menu Bar.

 \
\