Adjust Camera Orientation
Use the tripod head's Tilt, Pan, and Swivel knobs to adjust the camera orientation of the camera on the finish. You want to ensure that the green vertical line is perfectly aligned on the white finish line and that all lanes are visible in the Alignment Zone.
Adjusting Tilt
Aim the camera at a point approximately 2/3 of the way up the finish line and fine tune until an area comprised of the finish line plus another couple of lanes-worth above it is centered on the screen. Make sure the object of interest in both the inside and outside lanes is fully visible.
The area of the track covered by the camera can be changed by,
- Moving the camera nearer or further away from the track, and or, tilting the camera to change the field of view.
- Changing the value of Zoom on a zoom lens. See Optimize Lens Settings.
Adjusting Swivel
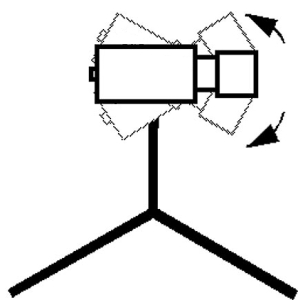
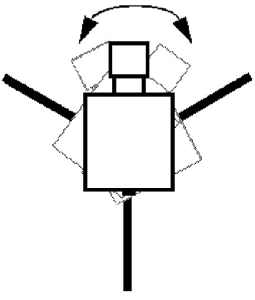
There are only two ways to be off swivel; the camera is either rotated clockwise or counter-clockwise.
Camera Off Swivel

|
|
Remember our definition of swivel and think of the center line of the camera as the minute hand of a clock; the camera is either a little “past noon” or a little “before noon,” as shown in the diagram above.
The way to tell which way the camera is off is to pan the camera through the finish line slowly in the direction of the competitors, and watch to see which part of the image sweep goes white first:
- Top first = top of camera must be rotated away from finish line.
- Bottom First = bottom of camera must be rotated away from finish line.
This adjustment can be made in one of three ways:
- Use a camera head that has a swivel adjustment.
- Extend the tripod legs to give the effect of rotating the whole camera.
- Shim one edge of the camera body relative to the platform on which it sits.
One of the most frustrating alignment problems can occur when the camera is slightly off swivel; that is, rotated to one side or the other.
For a
- The Level Indicator displays the value of the selected camera's electronic level in real-time while the swivel is adjusted.
|
|
Electronic Level not available. |
|
|
Not level > ±0.4 degrees |
|
|
Almost level > ±0.2 degrees |
|
|
Level < ±0.2 degrees |
The camera needs to be leveled on the swivel axis while reference marks on each side of the finish line are visible in alignment mode.
For this purpose, it is advisable, whenever possible, to position narrow markers on each side of the finish line or a single vertical marker 1 or 2 meters high, in the background across the track. Such a marker, needs to be leveled and of a distinct color from the natural background.
In the example above, the finish line is blue and a red narrow reference marker is set on each side of the track.
Adjusting Pan
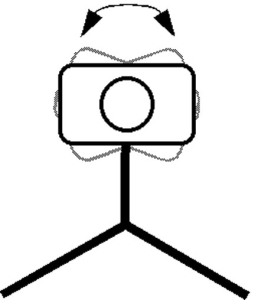
Pan is the left-to-right rotational adjustment of the camera.
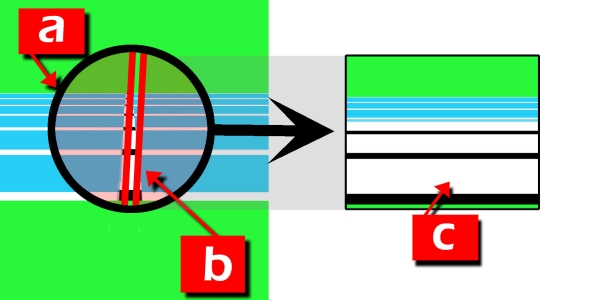
When the camera is panned first one way, and then the other, through the finish line, the operator will see the finish line appear on the screen as a vertical white stripe. The slower the camera is panned through the line, the wider the finish line will appear.
Adjust the Pan until the background of the track appears white and the lane lines appear black across the entire width of the track. If you have an EtherLynx 2000 OR Fusion camera, you can use the colors shown in the table below to speed up camera alignment.
Camera Alignment
|
Shown below – Fusion or 2000 camera Panning left to right across the finish line Arrows indicate direction camera needs to be moved to be on the finish line. |
|
|
The final step in adjusting the camera orientation using the geared head. Turn the camera to the left or right to align the green vertical alignment line with the edge of the finish line.


