Camera Settings
FinishLynx allows the operator to control the EtherLynx and
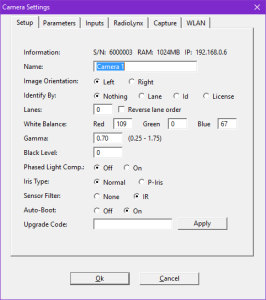
- The Camera Settings dialog can be accessed by selecting the camera to be adjusted from the Camera listing in the Hardware Control window or the Information Zone of an Event Window, and then clicking on the blue “i” information icon
 , or clicking Event | Get info... to open the Camera Settings dialog.
 - Alternatively, the Camera Settings dialog can be accessed by double-clicking the camera name in the Camera field.
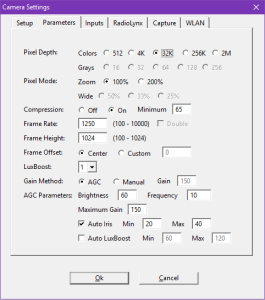
- The settings for Capture, Rate, Height, Mode, Gain, (Brightness) and Orientation can also be adjusted directly from the Camera listing, simply by typing new values over the existing values in these areas and then hitting the Enter key.
Camera Settings in Hardware Control window
- Capture Before you can actually begin taking pictures of races, you need to tell the software to accept the image sent from a camera. To do this, check that the Capture setting is configured to Yes for the camera(s) you wish to use. The advantage to being able to turn the capture capability on and off is that in a multiple camera setup you may not need image from all of the cameras all of the time.
- Other settings For all other settings in the Hardware Control window, refer to the information in the Camera Settings for more information.
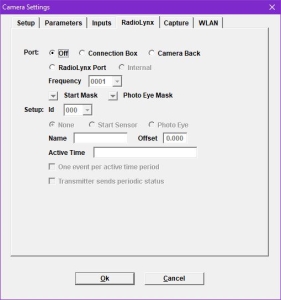
Camera Settings Dialog
-
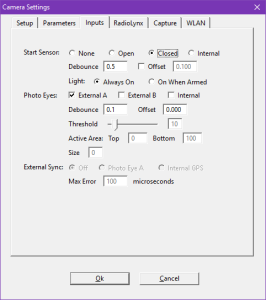
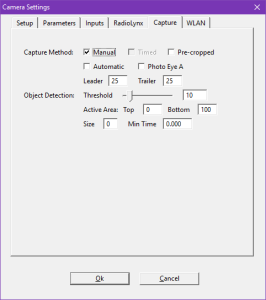
- Threshold This alters the percentage of image that has to change to capture new image.
- Active Area: Sets the vertical section of the image where an object should trigger FinishLynx into action. Expressed as a percentage of the total height (0 = top of image; 100 = bottom of image).
- Size Sets the minimum vertical size of an object to be detected.
- Min Time Set the minimum amount of time FinishLynx should capture image when a new object is detected.
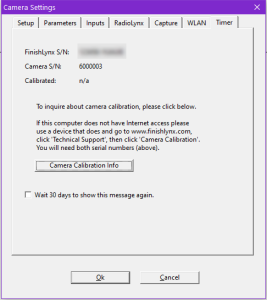
Timer Tab
- Camera Calibration Info click this button to get more information on camera calibration and certification.
NOTE: This tab will appear if the camera has not been calibrated in more than 4 years or if the calibration date is unknown.

