Camera Alignment Tools
The Focus Helper tool in the Hardware Control window makes it easier to optimize the image focus by displaying a relative number calculated by FinishLynx. The higher the number, the better.
![]()
When FinishLynx is in Align Mode, clicking the right mouse button allows you to select image either while aligning, or after alignment has stopped.
This can be used with the Focus Helper tool:
- If a region of image is selected, then the Focus Helper operates only on that region.
- If no region is selected, then the Focus Helper operates on the entire image.
FinishLynx allows the operator to zoom in or out in Align Mode.
- To zoom:
- Click the
 or
or  icons.
In align mode, you can now shift-click the zoom buttons to “shrink to fit” the image to the vertical size of the window, avoiding the need to scroll.
|
NOTE: 2D Align for EtherLynx Vision-Series cameras supports repeated shift-clicks to adjust the horizontal zoom. This can facilitate alignment by zooming into the finish line while still seeing the entire vertical image.
|
EtherLynx Vision-Series offer an electronic level option.
![]()
- To make sure the camera is level:
- Adjust the camera swivel until the electronic level icon is green, ideally displaying 0.0.
The Electronic View Finder (EVF) function for the Vision PRO X is available wirelessly from a web browser on your mobile device.
- To output the alignment view to your mobile device:
- Click the 1D or 2D alignment buttons.
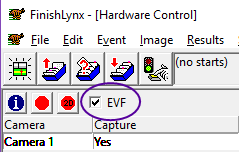
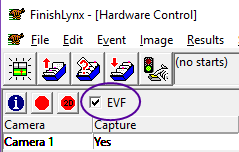
- Check the EVF box on the Hardware Control window in FinishLynx.
-
Go to the Wi-Fi settings on your mobile device:
- Connect to camera's wireless network: 5L700_[SN]
- Note: On your mobile device, confirm you want to connect, even if no Internet is available.
- Open a web-browser on your mobile device.
- Go to 192.168.4.1:8080
.
The HDMI Electronic View Finder (EVF) function is available as an upgrade on all EtherLynx Vision and Vision PRO cameras. EVF allows an external video display (sold separately) to be connected to the camera's HDMI port for local viewing during alignment. This can greatly facilitate the alignment process of EtherLynx Vision-Series cameras far from the FinishLynx computer.
- To output the alignment view to a video display via the camera's HDMI port:
- Connect the EtherLynx Vision-Series camera's HDMI port to a video display.
- Check the EVF box on the Hardware Control window in FinishLynx.
- Click the 1D or 2D alignment buttons.
- Use the Zoom buttons (+ -) to zoom in the alignment view.
Remote operations:
Alignment mode can also be controlled by pressing the A button on the camera back. Each press will cycle through different views - 2D Zoom 100% > 2D Zoom 200% > 2D Zoom 400% > 1D 100%.
- EVF checked + Alignment OFF = VDM Output
- EVF checked + Alignment ON = EVF Output
- EVF unchecked + Alignment ON/OFF = VDM Output
Automatic Exposure Control (AEC)
Automatic Exposure Control (AEC) is a 2D-Align mode for Vision-Series cameras. It is similar to the concept of shutter (vs aperture) priority on standard SLR cameras, and allows the 2D-Align exposure time to be controlled by FinishLynx, instead of being set to the 1D frame rate.
Video
Optimize Focus
After adjusting a Vision-Series camera's focus during a bright sunny day, you may find that the image becomes soft later in the day as light fades. This is caused by decreased depth of field, a trade-off of opening the iris. With AEC, you can simulate the worst case scenario by opening the iris completely during the initial set up. AEC will shorten the exposure time, avoiding a washed out image and allowing you to set the focus while depth of field is poor. Once AEC is disabled for operations, the aperture can be closed down as much as light allows. This ensures optimal focus throughout the day, regardless of the light conditions.
Low-light Alignment
Turn on AEC if you need to align a Vision-Series camera using 2D-Align in low-light conditions. The increased exposure time will reduce the noise and improve the image quality, making it easier to align.
How-to
- To enable AEC mode:
- From the Hardware Control window, select a Vision-Series camera configured for AGC.
- Start 2D-align.
- Check the AEC checkbox.


