
Printing Explanations
FinishLynx can print image, results and splits. If your printer is installed and working with your other programs, it will work with FinishLynx.
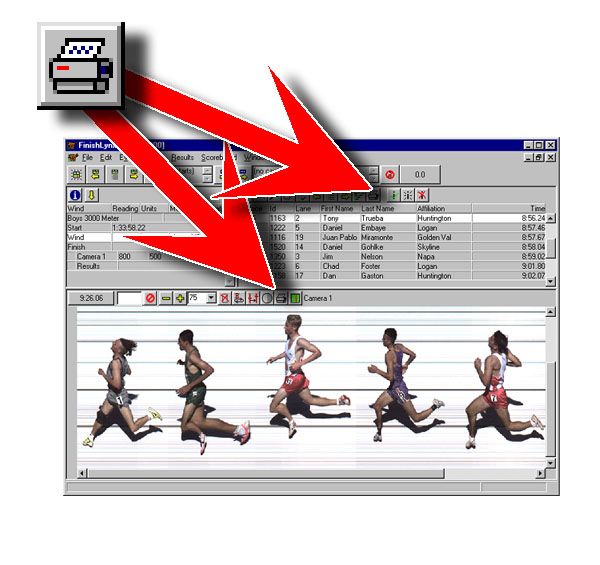
There are two separate print icons on the screen. One for printing results, and one for printing image.
Print Icons
To print results without the image:
- Click
 in the Results Zone, or Results | Print... from the Menu Bar. The Printer Settings dialog will appear.
 - Choose the settings you require and hit the Ok button, or simply press Enter.
- Alternatively, you can print results on the bottom of images. See HOW TO PRINT A FINISHLYNX IMAGE?
- Save the event with the file name desired for the image title. Events imported from database programs will appear with the name given in the database. Other events will have the default event name as the image title.
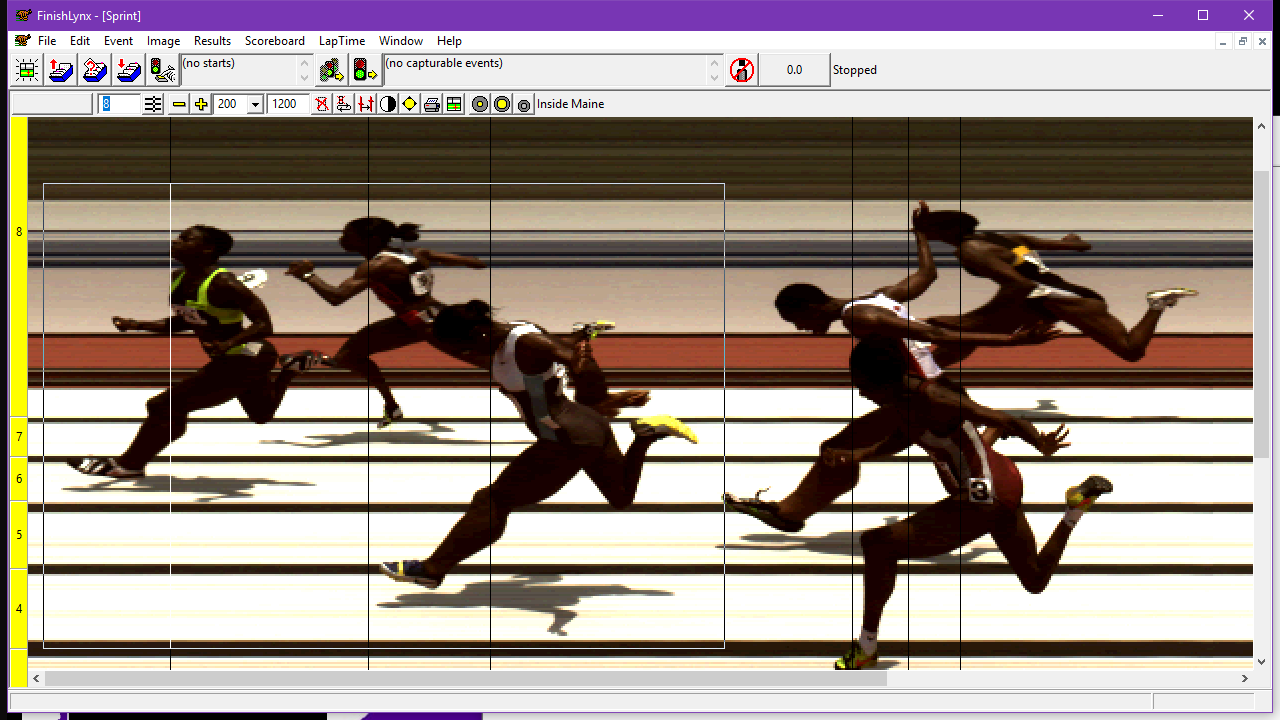
- Select a region of the image that you wish to print by holding down the right mouse button while moving the mouse. This will draw a box in the image zone which will define the area to be printed and call up a pop-up menu which lists a Print option.
- If no image is selected with the mouse then the entire image will be printed.
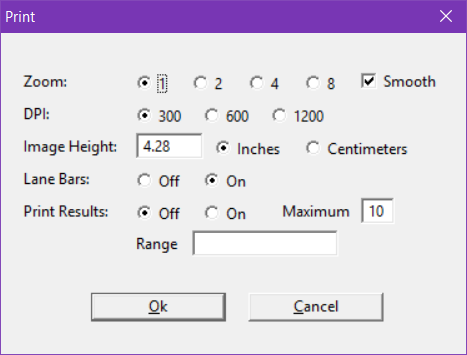
- Click on the Print option in the pop-up menu, or click in the Image Zone. The Print dialog appears.
- This dialog box presents settings that allow you to control the quality of the image. Based on the information you give the system on what kind of printer and the size of the image, FinishLynx decides how much data needs to be sent to the printer. In general, you should print at Zoom 1 and 300 or 600 DPI.
- Click Ok. The Printer Settings dialog appears.
- Click Ok.
- To print image with results, follow the steps above and:
- Click to set Print Results: On.
- Type in the maximum number to appear (top 3 for example) or a range of results (4-6 to print 4th to 6th place for example).
Print Dialog
The same FinishLynx image printed on a conventional printer can also be saved as a JPEG (*.jpg) or TARGE (*.tga) file.
- To print to a file:
- Save the event with the file name desired for the image title. Events imported from database programs will appear with the name given in the database. Other events will have the default event name as the image title.
- Select a region of the image that you wish to print by holding down the right mouse button while moving the mouse. This will draw a box in the image zone which will define the area to be printed.
- If no image is selected with the mouse then the entire image will be printed.
- Click Image | Print to bitmap... from the Menu Bar. The Print dialog appears. See HOW TO PRINT A FINISHLYNX IMAGE?
- Click Ok. The Save As dialog appears.
- Enter a file name.
- Select the Save as type:.
- Click Save.
- Select an area of image to be printed. See RIGHT MOUSE BUTTON for details.
- Left-click with the mouse near an evaluation line to select it. The line will highlight in the selected region.
- Print the image.
- FinishLynx will find the nearest time in the Results Zone and place a line there. At this point you can print the image as detailed in HOW TO PRINT A FINISHLYNX IMAGE? and the line will be printed.
See information in the LapTime module to learn how to print split times.
Images can be printed without and without lane bars.
- To remove lane bars on a FinishLynx image prints:
- Click Image from the Menu Bar and then select Print... The Print dialog appears.
- Click to select the Lane Bars: Off radio button.
- Click Ok.
FinishLynx displays the Competition Name: and Sponsor Name: on all printouts.
- To enter the competition and/or sponsor name in FinishLynx:
- Click File | Options... from the Menu Bar. The Options dialog appears.
- Type in the Competition Name: field.
- Type in the Sponsor Name: field.
- The text entered will appear at the top of all printouts.
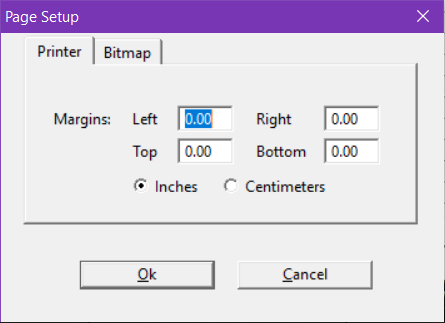
- Click Image | Page Setup... from the Menu Bar. The Page Setup dialog appears.
- Enter the preferred margin values.
- Click Ok.
- To change the margin for Bitmap images:
- Click Image | Page Setup... from the Menu Bar. The Page Setup dialog appears.
- Click the Bitmap tab.
- Enter the preferred margin values (pixels).
- Click Ok.
- To change the margin when printing results:
- Click Results | Page Setup... from the Menu Bar. The Page Setup dialog appears.
- Enter the preferred margin values.
- Click Ok.
Page setup
- To set a minimum size for Bitmap images:
- Click Image | Page Setup... from the Menu Bar. The Page Setup dialog appears.
- Click the Bitmap tab.
- Enter the preferred Min. Size: Width & Height (pixels).
- Click Ok.
When you print an image with results, you can select which results are included with the printed image by typing a value in the Range field by using the following methods:
- Comma separated list, such as 1,2,3,
- A bounded range, such as 4-99,
- An unbounded range, such as 4-,
- An unbounded arithmetic series, such as 1,3,…,or
- A bounded arithmetic series, such as 1,3,…15.
Other results definitions:
- If you want to specify which values are not allowed, begin the entire string with a carat, or ^.
- If you want to invert the meaning of a single field, begin the field with a tilde, or ~.
Results definition examples
- Accept 1 through 5:
- 1,2,3,4,5
- 1-5
- 1,2,...5
- Accept 11 and higher:
- 11-
- ^1-10
- Accept all odd values:
- 1,3,...
- ^2,4,...
- Accept all odd values to 15:
- 1,3,...15
- Accept all *but* odd values to 15:
- ^1,3,...15
- Accept 1-5, even values to 20 (except 14), then every third value:
- 1-5,~14,6,8,...20,23,26,...
- Accept all values divisible by 5 except those also divisible by 4:
- ~4,~8,~...,5,10,...
When printing results, the format of the results data is the same as the data in the Results Board of the Results Zone. You can add, remove, re-order and resize the Result Fields to meet your preferences.